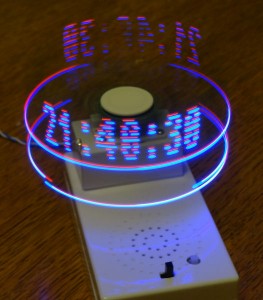
 These kits are available on Banggood.com for about $11 shipping included. Tricky soldering, and they don’t come with any instructions. There are instructions available on the website – but not unless you read Chinese. The pictures on the website help though.
Anyway, I recommend the kit. Even if you can’t get it working properly, it’s worth the money for the parts alone – you get everything you need apart from a bit of strip board to solder the power supply components to, and a hunk of aluminium to act as a heat sink on one power transistor.
It runs on about 4 volts up to 5 or so. I wouldn’t recommend going much above 5.5 volts as the ‘regulator’ on the main board is just a small zener diode that leaks current away once the voltage gets up to 5.1 It draws about a third of an amp – I run mine off a single LiPo cell.
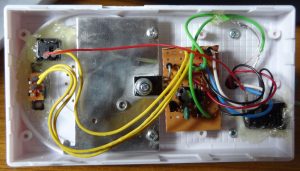
Gary asked about the inside of the box. Please see VoltLog’s build video – the only thing I did differently was to build up the circuit on some stripboard instead of in mid-air, and I added a bit of aluminium plate to the main power transistor to act as a heatsink.
There are more (and bigger) photos of the top and bottom of my stripboard layout here: https://ceptimus.co.uk/pov/
Look at this video on the Voltlog YouTube channel to get an idea of how tricky it is to build.
I certainly got good value from it as it also comes without a program – so I wrote one, and no tool for uploading the program to the microcontroller. See my previous post for the upload tool. Here’s the link to the hex file for my clock program. (Right click and save as… if it opens up as a text file when you click on the link).
https://ceptimus.co.uk/POVclock.hex
I made a quick video showing how to set the time. The camera settings were bad though – auto focus and strobing problems. 🙁

Leave a Reply